
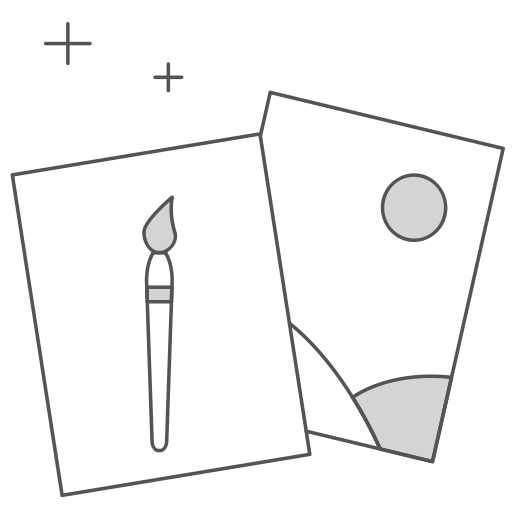
DIY Car Decals
Have you ever seen a cute car decal on someone else's car & be inspired to find one for yourself only to discover you can't find the one you are dreaming of? This DIY is for you! Read below on how to create your own design below.
There are two ways to make your decal:
By Hand
Making your decal by hand is a little more time consuming, but if you don't plan on making more vinyl stickers or projects doing it by hand is the most cost effective.
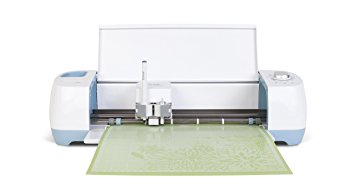
With A Vinyl Cutter
Making a decal with a vinyl cutter is simple and easy to do. Machines that do vinyl cutting are things like a Cricut Explore or a Silhouette cameo.
Supplies needed by hand
• Exacto Knife
• Cutting Board
• Scissors
• A Weather Resistant Vinyl (I Use This One From Amazon Because it is Cheap For A Lot https://www.amazon.com/gp/product/B06XBRNG2W/ref=oh_aui_detailpage_o00_s00?ie=UTF8&psc=1)
• Some Sort of Transfer Tape (I Typically Use Clear Contact Paper)
• Your Decal Image Printed Out (or Sketched) the Desired Size
• Some Tape
• Some Type of Scraper (This Could be a Credit Card)
Supplies Needed for Vinyl Cutter
• Vinyl Cutter
• Vinyl Cutting Mat
• Scissors
• Weeding Tools *** Optional
• A Weather Resistant Vinyl (I Use This One From Amazon Because it is Cheap For A Lot https://www.amazon.com/gp/product/B06XBRNG2W/ref=oh_aui_detailpage_o00_s00?ie=UTF8&psc=1)
• Some Sort of Transfer Tape (I Typically Use Clear Contact Paper)
• Some Type of Scraper (This Could be a Credit Card)
Making Your Decal By Hand
- Create or find your design.
Remember for decals they are solid colors. When looking for images I think of things like silhouettes or clip art. Also think of the thickness of all the lines, thinner lines are more difficult- the same thing is true for fonts. If you are picking a font try to make it bold so that it is easier to cut.
If you are looking for a website to find fonts, I usually use dafont.com to download my fonts and print them out.
2. Print out or have your design drawn to your desired size on paper.
3. Place your design on top of your vinyl having the vinyl side facing up.
4. Secure your design to your vinyl using tape.
5. Cut down vinyl to make it easier to work with, making sure to not cut off any areas of your design. Think of this as just trimming the edges.
6. Get your cutting board and place the vinyl on top.
7. Using your exacto knife carefully cut your design tracing your design’s lines. Make sure to apply enough pressure to not only cut the design paper but also the vinyl. If possible, at the same time try to be light enough to not cut through your vinyl’s backing.
8. Take off design paper and weed out your design. This is where you peel up the negative vinyl that is not a part of your design, leaving behind only your decal.
9. Using your transfer tape, peel the back off the transfer tape and slowly place directly onto the vinyl decal. I typically roll it onto the decal going from left to right.
10. Rub the transfer tape with your credit card to make sure the decal is on the transfer tape nice and smooth.
11. Go outside and clean your car window.
12. Take your decal that is now attached to transfer tape and peel the backing off of your vinyl.
13. Slowly place transfer tape and decal onto the window.
14. Rub with credit card to get the vinyl to stick and get out any possible bubbles.
15. Slowly peel off the transfer tape. If any of the vinyl begins to come up rub it again and continue.
16. Using the backing from the transfer tape or vinyl, place it over the decal and rub it with your credit card again making sure it is stuck and smooth. You now have your car decal!
Making Your Decal With a Vinyl Cutter
- Create or find your design.
Remember for decals they are solid colors. When looking for images I think of things like silhouettes or clip art. Also think of the thickness of all the lines, thinner lines are more difficult- the same thing is true for fonts. If you are picking a font try to make it bold so that it is easier to cut.
If you are looking for a website to find fonts, I usually use dafont.com to download my fonts and print them out.
2. Upload your design to your vinyl cutter’s program.
3. Cut your vinyl to size for your vinyl mat.
4. Place your vinyl onto your cutting mat.
5. Load you vinyl mat into your machine,
6. Select vinyl on your vinyl cutting machine and cut as you normally would.
7. After your design is done cutting, unload it from your machine.
8. Using your weeding tools get rid of the vinyl that is not a part of your design.
9. Using your transfer tape, peel the back off the transfer tape and slowly place directly onto the vinyl decal. I typically roll it onto the decal going from left to right.
10. Rub the transfer tape with your credit card to make sure the decal is on the transfer tape nice and smooth.
11. Remove your vinyl and transfer tape from your cutting pad.
12. Go outside and clean your car window.
13. Take your decal that is now attached to transfer tape and peel the backing off of your vinyl.
14. Slowly place transfer tape and decal onto the window.
15. Rub with credit card to get the vinyl to stick and get out any possible bubbles.
16. Slowly peel off the transfer tape. If any of the vinyl begins to come up rub it again and continue.
17. Using the backing from the transfer tape or vinyl, place it over the decal and rub it with your credit card again making sure it is stuck and smooth. You now have your car decal!